
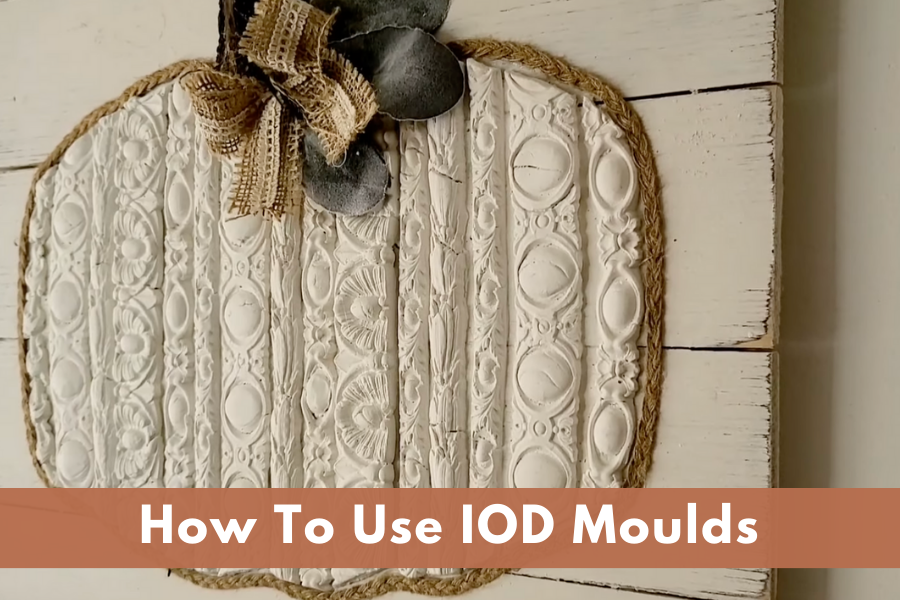
How To Use IOD Moulds To Create A Pumpkin Themed Piece of Wall Art for the Fall
**This post contains affiliate links for your convenience. I may earn a small commission if you make a purchase from these links.**
IOD Moulds, short for "Iron Orchid Designs Moulds," are a crafting tool designed to help DIY enthusiasts add intricate and detailed embellishments to their projects.
The moulds are used with various crafting materials, such as air-dry clay, resin, plaster, and more, to create decorative accents that can be added to furniture, home decor, and other projects. Crafters press the chosen material into the mould to create a detailed impression, and once the material has set, it can be removed from the mould and attached to a desired surface.
These moulds have gained popularity in the DIY and crafting community for their ability to elevate ordinary pieces into unique works of art. This tutorial will help you master the art of using IOD Moulds.
In this blog, I will share a step-by-step guide to learning How To Use IOD Moulds To Create A Pumpkin Themed Piece of Wall Art for the Fall that will infuse your space with the warm and vibrant spirit of fall.
Want to see more of my Fall Home Decor DIY videos? Watch Here
Below is a list of the items you will need to recreate this project:
Thrifted Wood Board
Sandpaper (220 grit)
Pumpkin Paper Pencil (optional)
Pencil
Cornstarch
Jute Braided Rope
Small Wood Branch From Your Yard
*Product can be purchased directly through my website [www.juliesdesignsandsigns.com]
I thrifted this wood board and decided to create wall art for the fall using IOD Moulds!

First, using my STAALMEESTER Pointed Sash Brush, I paint 2 coats of Dixie Belle Chalk Paint in Cotton on the wood board.

Then I distress the painted board with my sander.
I use 220 grit sandpaper.
I like to hit the edges a little bit harder and then lightly distress the rest of the piece.

DIY TIP: When you are upcycling wall art that has already been put together make sure you are doing it the right way according to where the hanger is attached on the back.

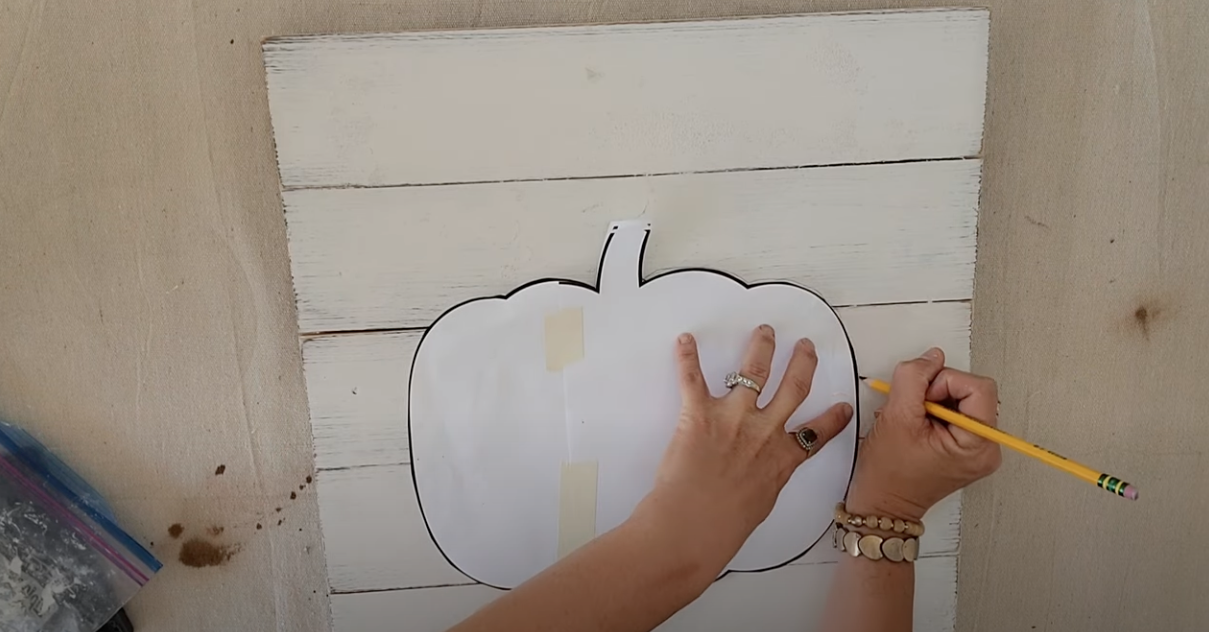
I printed an image of a pumpkin on my computer and then traced it onto the board.
You can also free hand this if you would like too.

I used the IOD Trimmings Mould 3 for this project.

To ensure the clay does not stick, brush cornstarch over the mould.
I didn’t have any cornstarch on hand, so I went ahead and used flour. Either option works!

Then, I pushed the IOD Air Dry Clay into the moulds.

The IOD moulds come with a micro rim, so it makes it super easy to remove the excess clay from the edges.
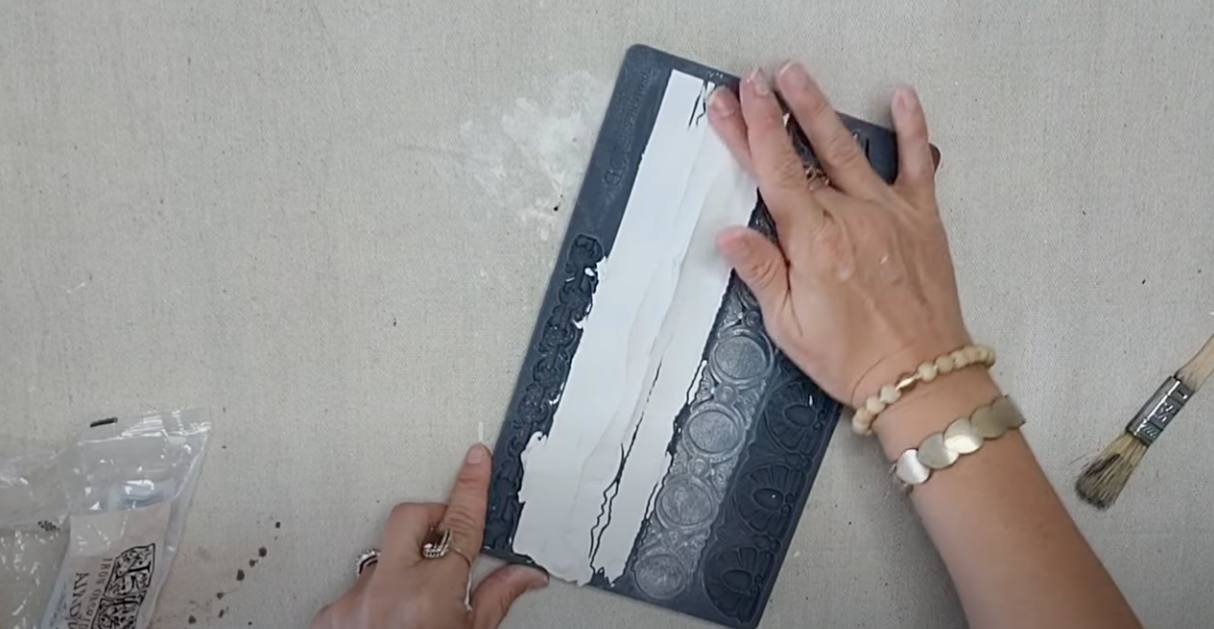
To get the clay out of the mould, you can bend the mould back and forth, and the clay will pop out nicely.


Once I created all the clay pieces, it was time to start laying them on the wood board.
Using an exacto knife, I lay out each piece and then cut off the excess so that the clay pieces take the shape of the pumpkin.

Once I cut the edges of the clay pieces to fit the pumpkin outline, it was time to start gluing them down to the board.
I like to glue them down when the clay is still wet.


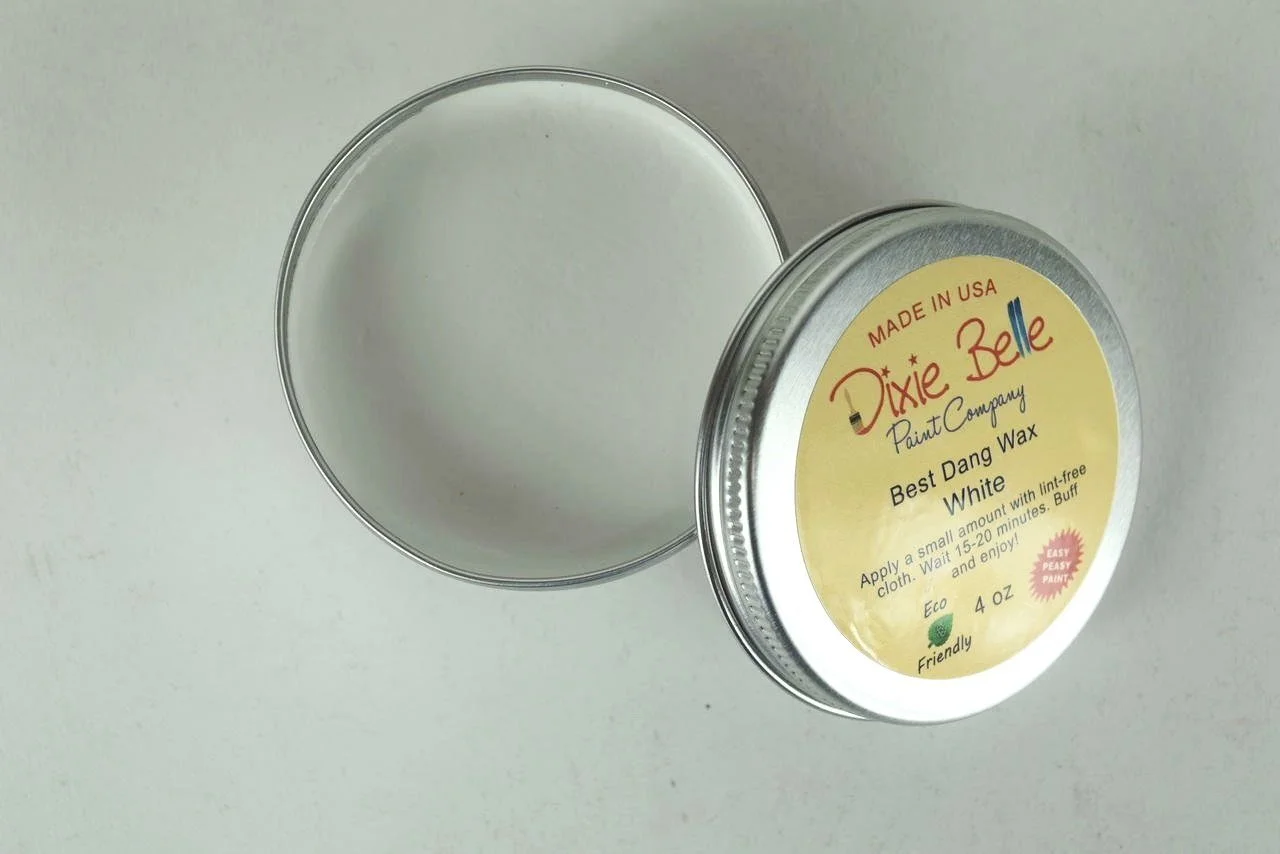
Once the clay had dried for 24 hours, I decided to go over it with white wax.
I decided to go for a more muted look; however, you could use color too!
Your clay may crack a little while drying, but the white wax will help camouflage those cracks.

Then, I took a dry paper towel to wipe off a little bit of the wax so that a little bit of texture shows through.

I used a braided jute rope to add an outline to the pumpkin.
Using a hot glue gun, I glued the braided jute rope around the edges of the clay pumpkin.


Next, I decided to add a stem and some greenery to the piece.
l grabbed a piece of wood from my backyard and used my jigsaw to cut it down on one side.

Using my hot glue gun, I glued down the wood at the top of the pumpkin.
I also used some lambs ear to add greenery to the overall design.

Here is the final product!
I love a more muted look for fall so this goes perfectly with my home decor.

This blog is all about How To use IOD Moulds To Create Pumpkin Wall Art for Fall
As always, subscribe to my YouTube channel so you never miss one of my DIY videos.
You can watch me create this project and many others like it here: https://youtu.be/lJmnSpZ_Hok
Click the image to shop


What is the Colors of the Month Club?
Don’t forget to join the Colors of the Month Club to receive (4) sample Fusion Paint colors I picked that are perfect for the current season! → Click here to learn more
Like what you see? Be sure to join our mailing list for weekly DIY Ideas, thrift flips, new product alerts, video announcements, live events & more!
DISCLAIMER: This blog post may contain affiliate links. If you purchase a product or service with the links provided I may receive a small commission. There is no additional cost to you. Thank you for supporting my blog so I can continue to provide you with free content each week!