
Halloween Decoration Ideas: How To Create DIY Ghosts
**This post contains affiliate links for your convenience. I may earn a small commission if you make a purchase from these links.**
DIY Halloween decorations are often more budget-friendly than store-bought ones. You can repurpose items you already have at home or use inexpensive materials like paint, paper, wood and thrifted supplies.
Many DIY Halloween projects involve upcycling old items. For example, you can turn empty glass jars into halloween-inspired candle holders, or repurpose old clothing into scarecrows or ghosts. Halloween wreaths made from materials like faux spider webs can be a welcoming yet spooky addition to your front door.
Creating DIY Halloween decorations can be a fun and creative way to get into the spooky spirit of the holiday!
In this blog, I will show How To Create DIY Ghosts!
RELATED POST [DIY Ghost-Inspired Halloween Decorations]
Below is a list of the items you will need to recreate this project:
Old Thrifted Spindles
Foam Craft Balls or Thrifted Ornament Balls
Drop Cloth
Lace Material
Scissors
Black Sharpie
Blank White Paper
*Product can be purchased directly through my website [www.juliesdesignsandsigns.com]
For this project, I didn't need to buy anything new. I scoured my craft supplies and used items I already had on hand!
To get started, I began with old thrifted cut-off spindles, dowel rods, and some leftover ornament balls from last year's Christmas DIY projects.
I suggest searching garage sales, estate sales, thrift stores, or even repurposing old furniture you already own when searching for wooden spindles.

Lace Ghost DIY:
For this particular project, I chose drop cloth fabric and incorporated some lace material as well.

With my cordless power drill, I proceeded to drill a hole into the top flat surface of the spindles.

Next, I carefully applied a small amount of hot glue into the freshly drilled hole within the spindle.

Then, I inserted a dowel rod into the hole, allowing the hot glue to set around it.

To make sure that the dowel rod blends in nicely with the rest of my spindles, I decided to paint the dowel rod with Fusion Antiquing Glaze.

After the Fusion Antiquing Glaze had dried completely, I grabbed one of my ornaments and I removed the metal hook.

Then, I used my hot glue gun to add a drop of glue to the hole in my old ornament.

I then positioned the ornament onto the dowel rod, allowing the hot glue to securely bond the ornament and the dowel rod together.

Once I had the base of my ghost created, it was time to work on the fabric for my ghost.

I chose to utilize the lace material as a template to determine the dimensions for my drop cloth material.
I laid out the drop cloth material, set the lace material on top, and then cut the drop cloth to those same dimensions.
I would suggest cutting the fabric into a circular shape that is spacious enough to drape over the ghost's base.

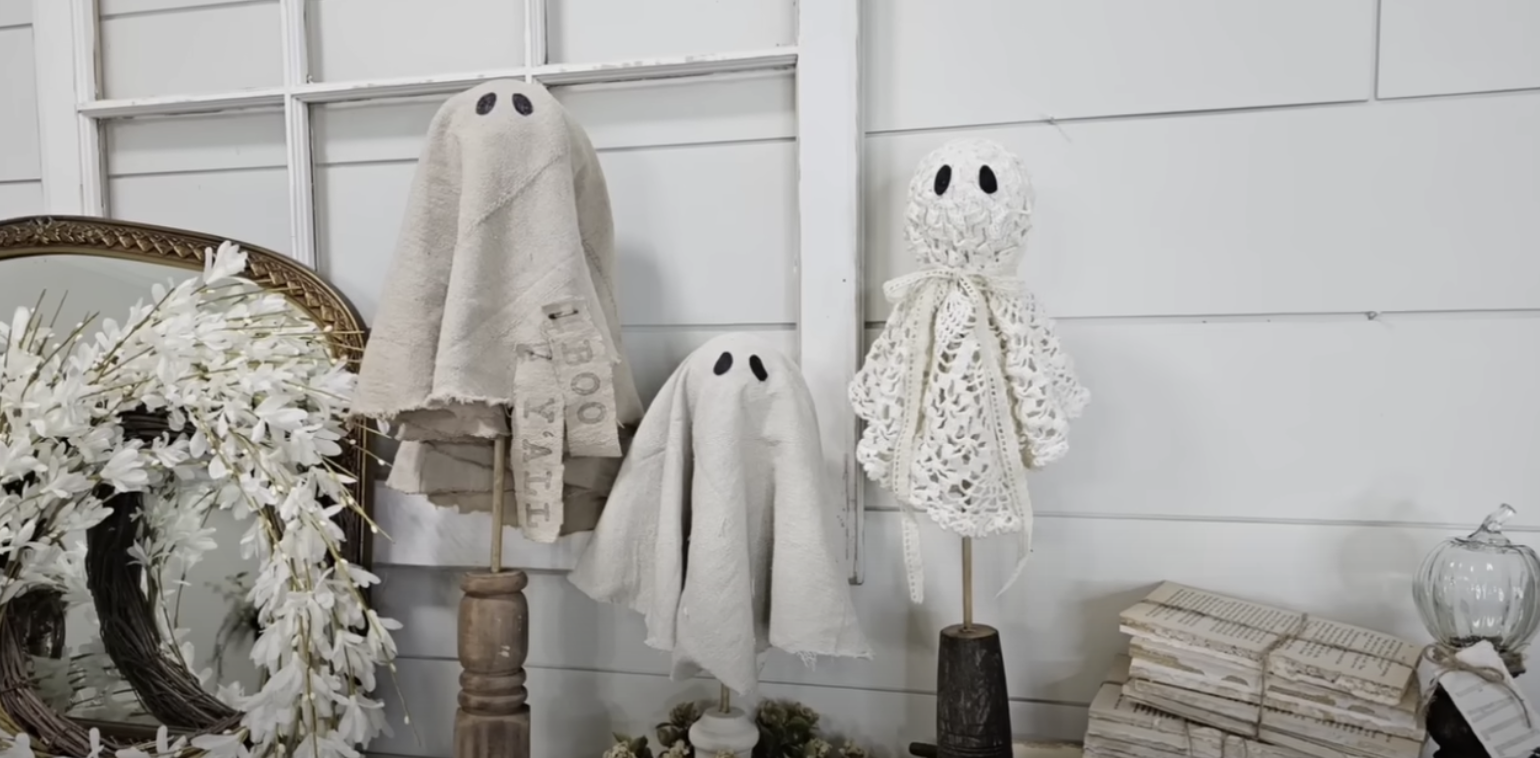
The first ghost I created was the lace ghost!
All I had to do was drape the lace material over the top of the round ornament.

To give the ghost its shape, I used a scrap piece of lace to tie directly around the middle of your ghost. This technique will accentuate the shape of your ghost.

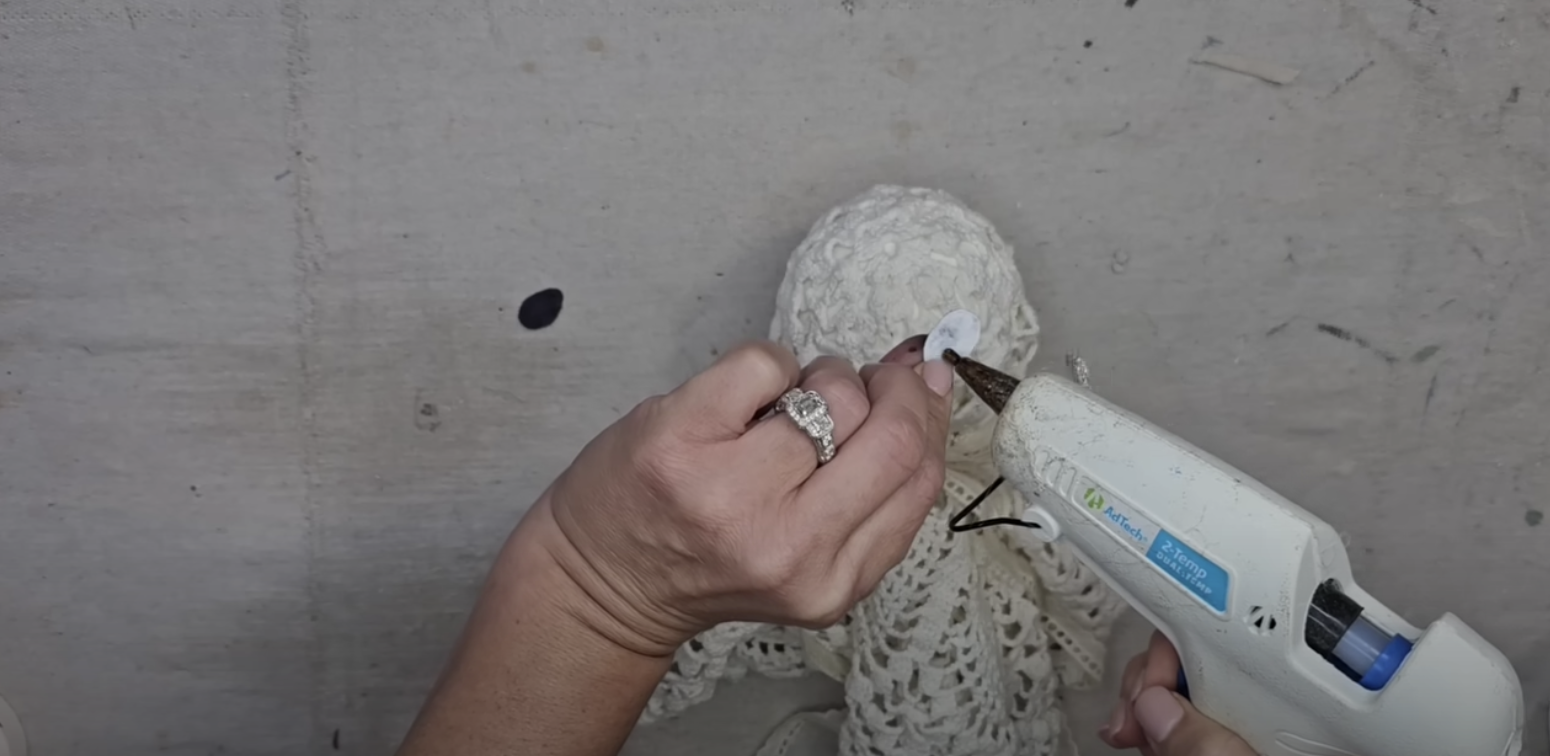
For this next part, you can create the black eyes in one of two ways.
Cut out black felt circles OR draw your own eyes on blank paper.
I decided to draw the black eyes on white paper with a Sharpie.

Then, I cut out the eyes and hot glued them onto the lace.

Drop Cloth Ghost DIY:

For this one, I decided not to tie material around the middle of my ghost.
Instead, I applied hot glue to the outside of the round ornament.
Then, I firmly pressed around the top of the ghost so that the material attached directly to the head of your ghost.

And then, I hot glued the eyes to the drop cloth using the same technique as I did above for the lace ghost.

Yes, I could technically stop there, and my ghosts would be absolutely beautiful and creative. However, for this project, I continued to embellish my ghosts until they were perfect for my home decor style!
I used the IOD Letterpress Stamp, an ink pad, and black ink - to accomplish this look.
I laid out the letters of the words BOO and Y’ALL! You can choose any Halloween-inspired words for your ghost.
Follow the below steps to use your IOD Letterpress stamps:
Select your letters (if your word uses duplicate letters, you can reuse the stamp)
Lay the stamps onto your thin mount
Apply IOD ink to the empty ink pad
Press the ink pad into your stamps
Flip the thin mount over and press firmly into the drop cloth so that the stamps evenly transfer


How CUTE is that?? Perfect for Fall, Y’all!

Lastly, I used safety pins to attach the drop cloth embellishments to my ghosts.

I wanted the safety pins to look old and rustic, so I used my black sharpie to give them a more aged look.

And that is it! How neat is this little ghost garden below?

This blog is all about Halloween Decoration Ideas: How To Create DIY Ghosts
RELATED POST [DIY Ghost-Inspired Halloween Decorations]
Click Image To Shop


What Is The Colors Of The Month Club?
Don’t forget to join the Colors of the Month Club to receive (4) sample Fusion Paint colors I picked that are perfect for the current season! → Click here to learn more
Like what you see? Be sure to join our mailing list for weekly DIY Ideas, thrift flips, new product alerts, video announcements, live events & more!

DISCLAIMER: This blog post may contain affiliate links. If you purchase a product or service with the links provided I may receive a small commission. There is no additional cost to you. Thank you for supporting my blog so I can continue to provide you with free content each week!


Easy Christmas DIY Home Decor Projects