
How To Guide: DIY Ghost-Inspired Halloween Decorations
**This post contains affiliate links for your convenience. I may earn a small commission if you make a purchase from these links.**
BOO! It’s time to haunt your home with DIY ghost decor for Halloween!
In this blog, I will show How To Create DIY Ghost-Inspired Halloween Decorations!

RELATED POST [Halloween Decoration Ideas: How To Create DIY Ghosts]
Below is a list of the items you will need to recreate this project:
Wood Rounds - (Small and Medium)
Drop Cloth
Lace Cloth
Embroidery Hoop (small)
Hammer
Tea Bags
Large Mixing Bowl
*Product can be purchased directly through my website [www.juliesdesignsandsigns.com]
Drop Cloth Doily Ghosts

To create drop cloth doily ghosts, I used items that I already had in my craft stash.
I linked the products in this blog so that you can recreate them too!

First, I started with two wood rounds which are going to be used to create the shape of the ghosts.

Then, I cut 2 pieces of drop cloth the same size for the front and back of our ghost.
I would recommend cutting the fabric 12-14 inches in length.

Next, I laid one of the pieces of drop cloth down on the table.
Then, using my hot glue gun I applied glue to one side of the wooden round.

Then, I flipped over the wooden round and firmly pressed it into the drop cloth material.
This will create the ‘head’ of your ghost, so you will want to place the wood round at the top of the material. You can see a placement example in the photo below.


Next, I applied hot glue to the other side of the wooden round.

Then, I took the second piece of drop cloth material and laid it on top of the wooden round so that the edges lined up with the other piece of drop cloth.

Then, I used my hot glue gun to apply one last line of glue to the drop cloth material around the top of the wooden round.
You can see in the image below where I applied the glue to attach both sides of the drop cloth to each other.

Once the glue dried, I cut around the top so that my ghost’s ‘head' had a round shape.

I rubbed sandpaper along the edges to give my ghost a bit of a distressed, rustic look. This helped fray the fabric a little bit.

Once I finished sanding the ghost, it was time to paint the ghost's face!
You can either free-hand OR use a stencil to create the ghost face.
I used a STAALMEESTER Artist Round Brush and Dixie Belle Chalk Paint in Caviar to free-hand the face for my ghost.


Then, I took my craft scissors and vertically cut 1-inch strips starting at the base of my ghost fabric. Don’t worry if the cuts are not perfectly even.

Once again, I used sandpaper to lightly sand the cut-up strips of fabric. This will continue to give the ghost a distressed and rustic texture.

The great thing about DIY is that you can ultimately make up craft ideas as you create.
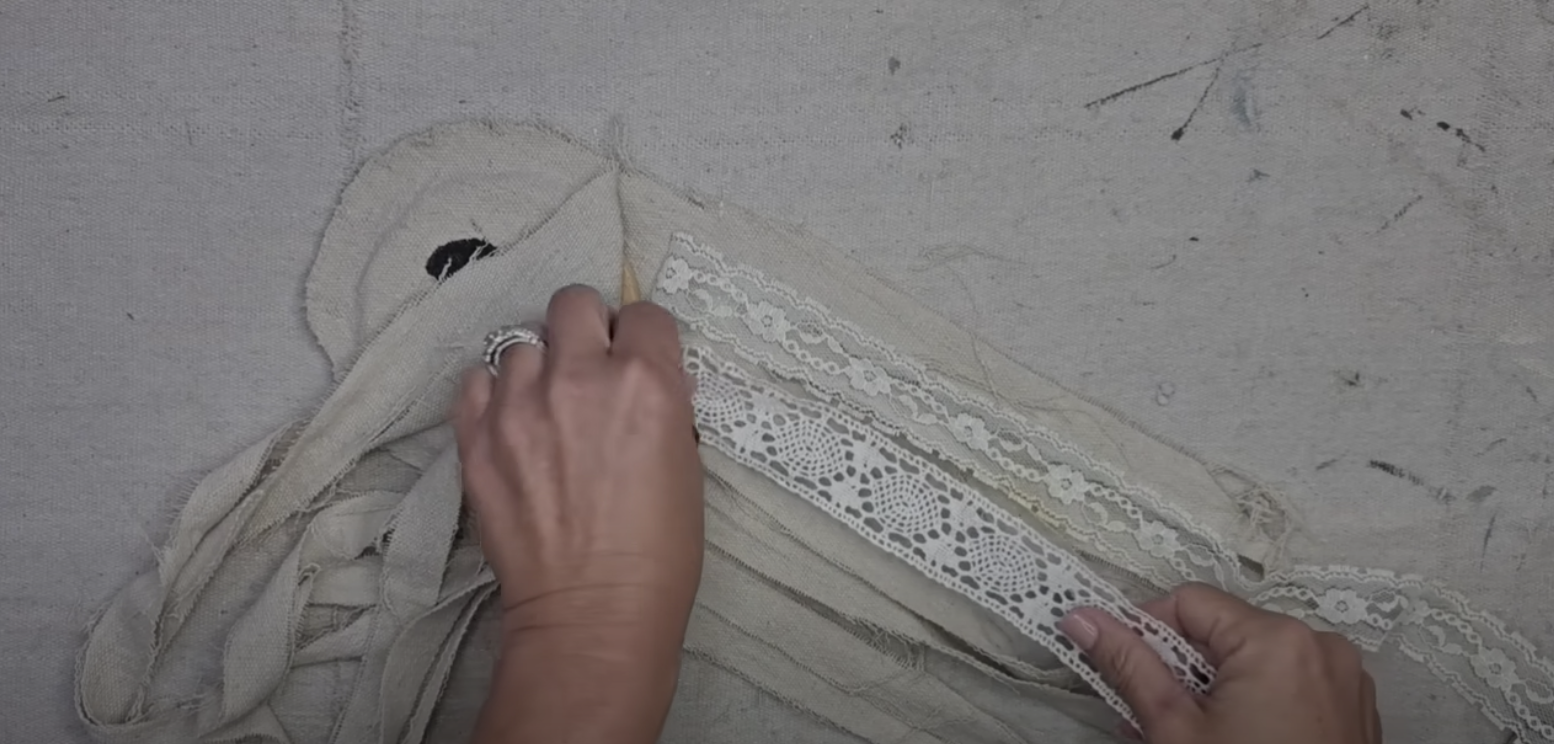
I felt like my ghost needed a little more! So I decided to pull out some extra lace fabric I had sitting around.
I cut the lace fabric into strips similar to the bottom of my ghost.

Then, I pulled up the top layer of the ghost and used a hot glue gun to apply glue onto the drop cloth right above the cuts.

Then, I laid down the lace strips onto the glue lines so that the lace blended nicely with the drop cloth material.
Now that she is looking a little more feminine, I had to add a cute lace bow to our ghost! :)

To finalize our ghosts so that we can hang them up, I used a hammer to install sawtooth picture hangers to the backside of the wooden rounds.
You can watch how I did this HERE (start at the 17:49)

I wanted my big ghost to be a little bit more rustic so I decided to tea dye it!
To tea dye drop cloth, you will follow the steps below:
Fill a bowl with water
Add tea bags (the more tea bags the darker the color will be)
Place your entire ghost into the bowl of tea
Make sure the tea stains all of the fabric
Remove the ghost and let it dry


Once the ghost dries, you can hang it up in your home amongst all of your other Halloween Decorations!
Comment below and tell me which ghost is your favorite!
RELATED POST [Halloween Decoration Ideas: How To Create DIY Ghosts]

This blog is all about DIY Ghost-Inspired Halloween Decoration Ideas!
Click Image To Shop


What Is The Colors Of The Month Club?
Don’t forget to join the Colors of the Month Club to receive (4) sample Fusion Paint colors I picked that are perfect for the current season! → Click here to learn more
Like what you see? Be sure to join our mailing list for weekly DIY Ideas, thrift flips, new product alerts, video announcements, live events & more!

DISCLAIMER: This blog post may contain affiliate links. If you purchase a product or service with the links provided I may receive a small commission. There is no additional cost to you. Thank you for supporting my blog so I can continue to provide you with free content each week!


**This post contains affiliate links for your convenience. I may earn a small commission if you make a purchase from these links.**
Easy Christmas DIY Home Decor Projects