
Halloween Decor Ideas: Creating DIY Ghost Decorations with Thrifted Fence Boards
**This post contains affiliate links for your convenience. I may earn a small commission if you make a purchase from these links.**
Halloween is just around the corner, and what better way to embrace the spirit of this spooky holiday than by crafting your very own Halloween home decor?
Creating your own Halloween Decorations is not only cost-effective but it’s also a lot of fun!
I listed out a few reasons why I LOVE DIY’ing my holiday decorations:
Sustainability: Crafting your own decorations allows you to repurpose items from around your home, giving them a second life in the world of Halloween decor. Of course, this means less waste!
Personalization: DIY decorations offer endless opportunities for personalization. You can tailor your spooky creations to match your unique style and preferences, ensuring your Halloween decorations stand out.
Family Time: DIYing Halloween decorations can be a fun family activity. It's a great way to involve kids in the creative process and make memories together.
Skill Development: Whether you're a seasoned DIY’er or just starting, creating your Halloween decor can help you develop new skills. From painting and crafting to woodworking and stamping, there's always something new to learn.
Year-Round Statement Pieces: Some DIY Halloween decorations can double as year-round decor! This means your crafts can be enjoyed beyond the Halloween season.
Community: DIY’ers often share their creations with others. You can participate in local or online DIY communities, showcasing your work and gaining inspiration from fellow crafters.
Traditions: DIYing Halloween decorations allows you to establish your own family traditions. You can create unique pieces each year or add to a growing decor collection.
Sense of Achievement: Completing a DIY Halloween decoration project can provide a sense of accomplishment. There's nothing quite like seeing your handmade creations bring joy (and a little fright) to your home (and guests) during the Halloween season.
In this blog, I will show How To Create Unique Halloween Decor Ghosts Using Fence Boards!
Like what you see? You can view more of my Halloween Decor DIY videos HERE!

Below is a list of the items you will need to recreate this project:
Fence Board Scrap Pieces
Sharpie
Pencil
Wet Wipe
Drop Cloth Strips
Tea Bags
Small Bowl Filled With Water
*Product can be purchased directly through my website [www.juliesdesignsandsigns.com]
To create the ghosts I started with scrap pieces of fence board.
If you are not sure where you can find scraps of fence board - I listed some suggestions below:
Thrift Stores
Facebook marketplace
Garage Sales/Yard Sales
Reclaimed Building Material Yards
Farm Supply Stores
Find A Local Company That Installs Fences

First, I used a sharpie to outline the top of the ghost on the fence board.
Don’t worry if your outline is not perfect.
The more organic the top of the ghost looks - the better!


I decided to create 3 ghosts for this project!

As you can see, there is now a raw edge after I made the cuts in the fence board.
I applied Fusion Antiquing Glaze to the raw edges so that it blends with the aged look of the fence board pieces.

Then, I used a stencil that I found online of a ghost face. You can free hand this as well if you would like!

To ensure that the face does not move around when I trace the pattern onto the wood - I applied a piece of tap at the top of my stencil.

I slid tracing paper in between the wood and the ghost face stencil.
Then, I outlined the face with a pencil. The tracing paper transfers the outline onto the wood.

Next, I removed the tracing paper and lifted up the stencil.
Your wood fence board should look like the photo below!

Now it is time to paint in the face of our ghost!
I recommend using a STAALMEESTER Artist Round Brush and Dixie Bell Chalk Paint in the color Caviar.
I used chalk paint because I can lightly sand it for a more rustic, distressed look.

Once I was down painting the ghost faces, I let the paint completely dry.

While the paint is drying, I decided to pull out my drop cloth and cut a few strips to make ties.

I wanted my drop cloth to have a rustic aged look so I decided to dye the cloth in tea bags. I added a few tea bags to a bowl of water and soaked the drop cloth strips in the tea.
This technique stains drop cloth a beautiful rustic color.
Make sure you let your drop cloth strips dry before moving on to the next step.
Once the cloth is dry, it is time to use our IOD Letterpress Stamps, your Empty Ink Pad and IOD Ink!

For my ink, I mixed orange and red to create a burnt orange color. Did you know you can mix IOD ink colors? Now you do! :)
For this project, I am going to spell B-O-O onto the drop cloth tie.
First, I placed the stamps on my thin mount.
You will notice that I only have a B and an O in the below photo. Since the collection only has (1) O, I will reuse it for the second O to spell BOO!

I flipped over my ink pad and generously applied ink to the back of my B and O stamps.

Next, I flipped over the thin mount and pressed the stamps into the drop cloth tie.

Then I lifted up the thin mount, removed the B and applied a second O to complete the wood BOO.

To give the ghost faces a more distressed look, I lightly sanded the ghost faces until they looked rustic and weathered like the fence board.
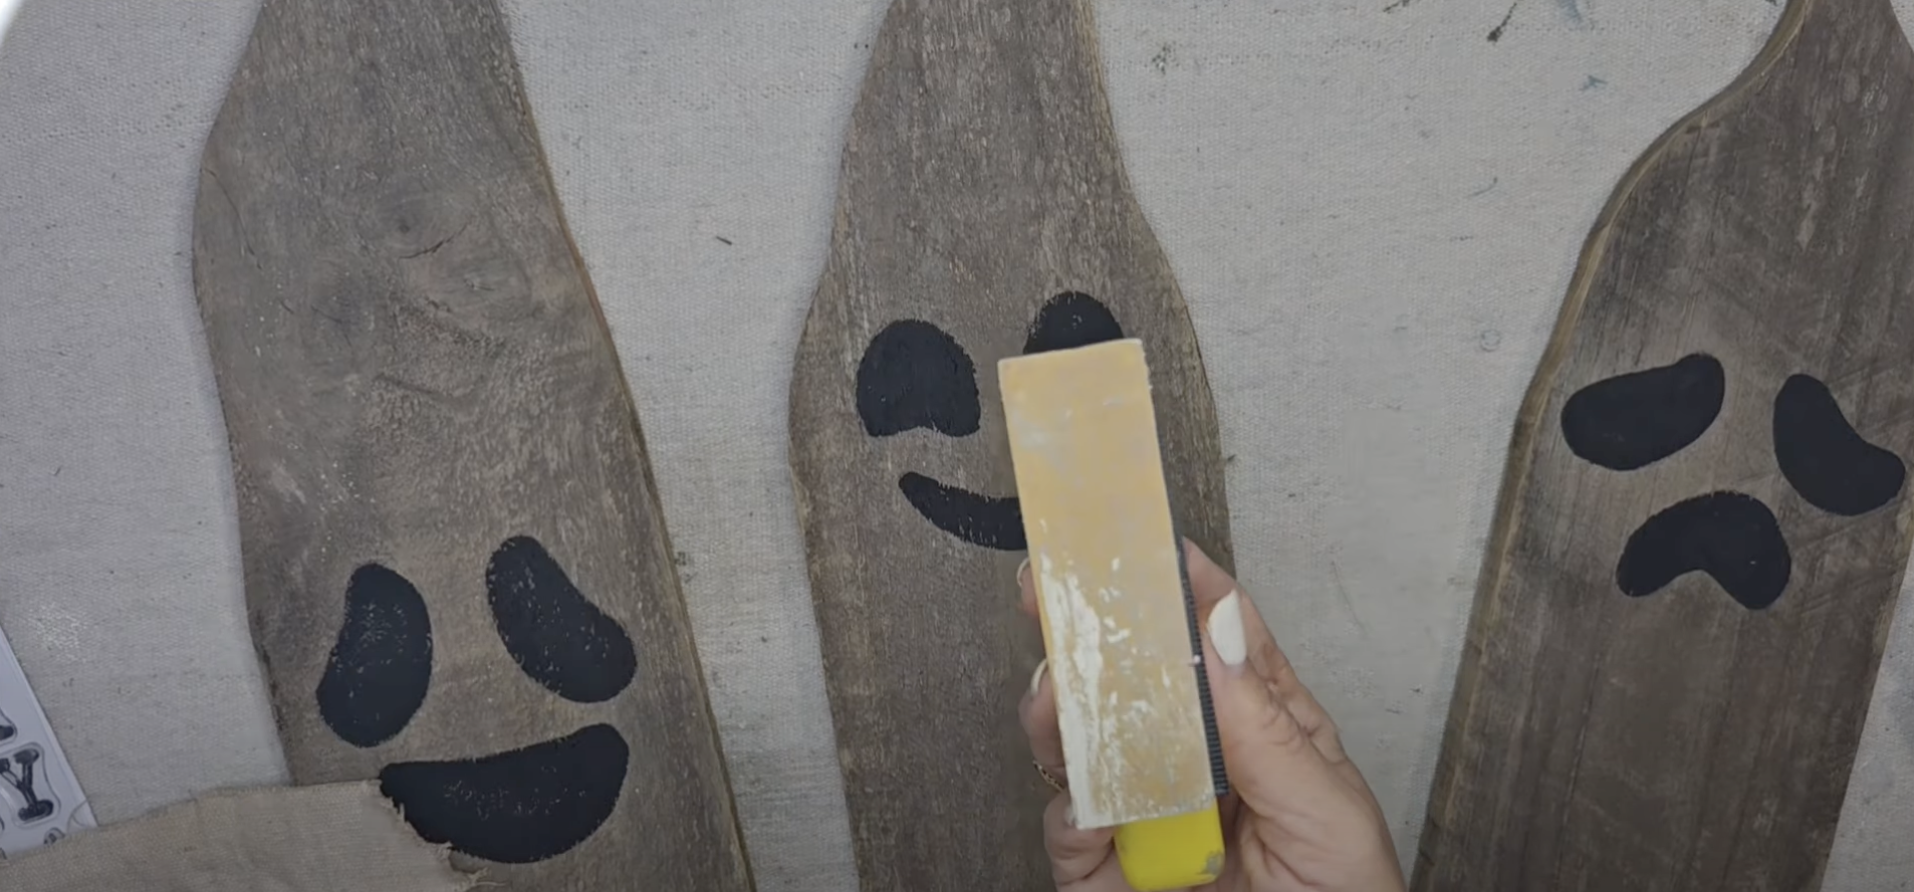

After I sanded the paint, I took a wet wipe to lightly wipe off the dust.

Ps. Don’t forget to tie your BOO tie onto your ghost! How cute is he looking?

EXTRA BONUS STEP: I like to make my ghosts stand up!
You can take another scrap of fence board and cut it in a triangle like you see below. You will want the bottom and the side that will touch the ghost to be straight.

Now it is time to attch the base to the ghost!
First, I placed the flat and long side of the base to the back of the ghost. Then, I flipped over the ghost so that I was looking at it from the front.
Using a cordless nail gun, I nailed through the front of the ghost right into the base that is behind it. (You will want to use a few nails so that it is perfectly attached)


How cool is that? By following this step by step guide, you can create as many DIY ghosts as you would like for this Halloween season!
Do you have any questions for me? Add them to the comments below!

This blog is all about How To Create Unique Halloween Decor Ghosts Using Fence Boards!
Click Image To Shop


What Is The Colors Of The Month Club?
Don’t forget to join the Colors of the Month Club to receive (4) sample Fusion Paint colors I picked that are perfect for the current season! → Click here to learn more
Like what you see? Be sure to join our mailing list for weekly DIY Ideas, thrift flips, new product alerts, video announcements, live events & more!
DISCLAIMER: This blog post may contain affiliate links. If you purchase a product or service with the links provided I may receive a small commission. There is no additional cost to you. Thank you for supporting my blog so I can continue to provide you with free content each week!


Easy Christmas DIY Home Decor Projects