
How To DIY Resin Casting Picture Frames into Vintage Christmas Ornaments
**This post contains affiliate links for your convenience. I may earn a small commission if you make a purchase from these links.**
This is one of my favorite projects that I have created! I love how these came out and I had so much fun creating them.
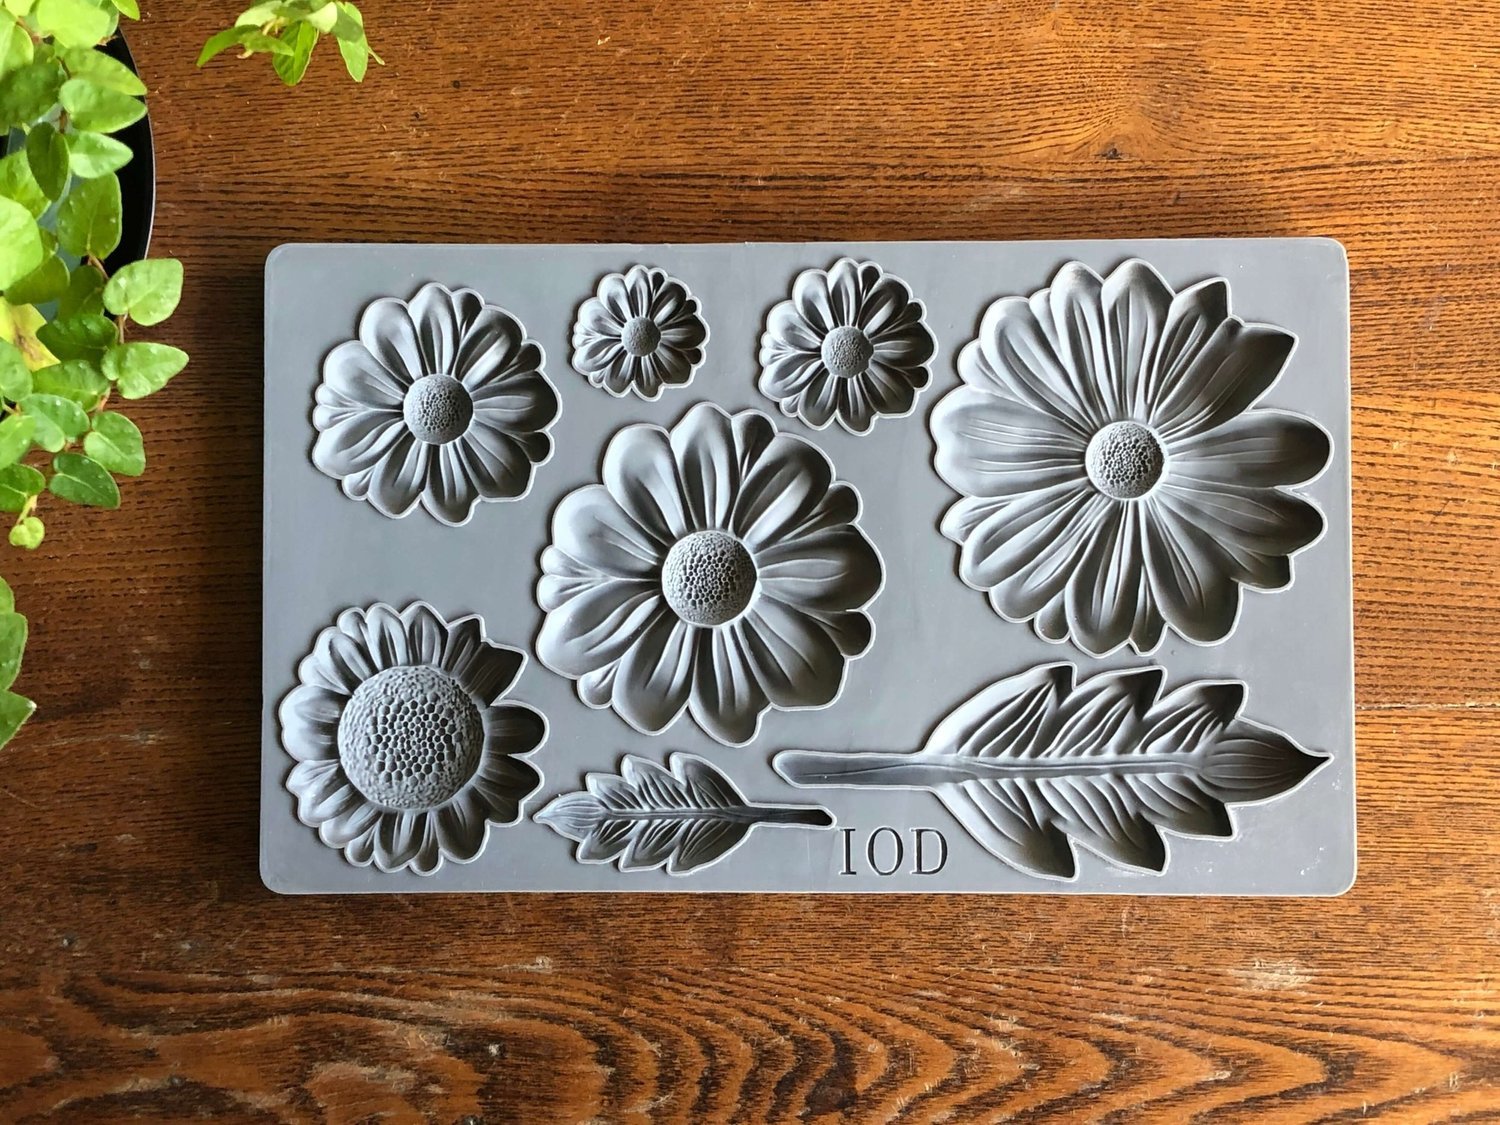
I am utilizing resin castings from two IOD frames moulds, Frame 1 and Frame 2. You can purchase both on my website.
If you prefer a hands-on approach, you can find both IOD moulds available for purchase on my website to craft your own using clay or resin!
I sell a wide variety of IOD moulds on my website! You can check out a few options below:


In this blog, I will show you How To DIY Resin Casting Picture Frames into Vintage Christmas Ornaments!

Below is a list of the items you will need to recreate this project:
Scissors
Red Ribbon
*Product can be purchased directly through my website [www.juliesdesignsandsigns.com]

I used the JRV Decoupage Paper from the Advent Calendar collection to embellish my resin frames!
This collection has 24 different vintage Christmas images to choose from.
I cut out the images that I wanted to use for my picture frames and set them aside.

The resin frames are already white. You can leave them white or follow my lead and apply Fusion Antiquing Glaze to give your picture frames a vintage and antique look.

I applied fusion antiquing glaze with a dry brush all over the frame and then used a paper towel to wipe it off,
DIY TIP: This process can be a little time-consuming. However, it does create a beautiful ornate look when you are finished!
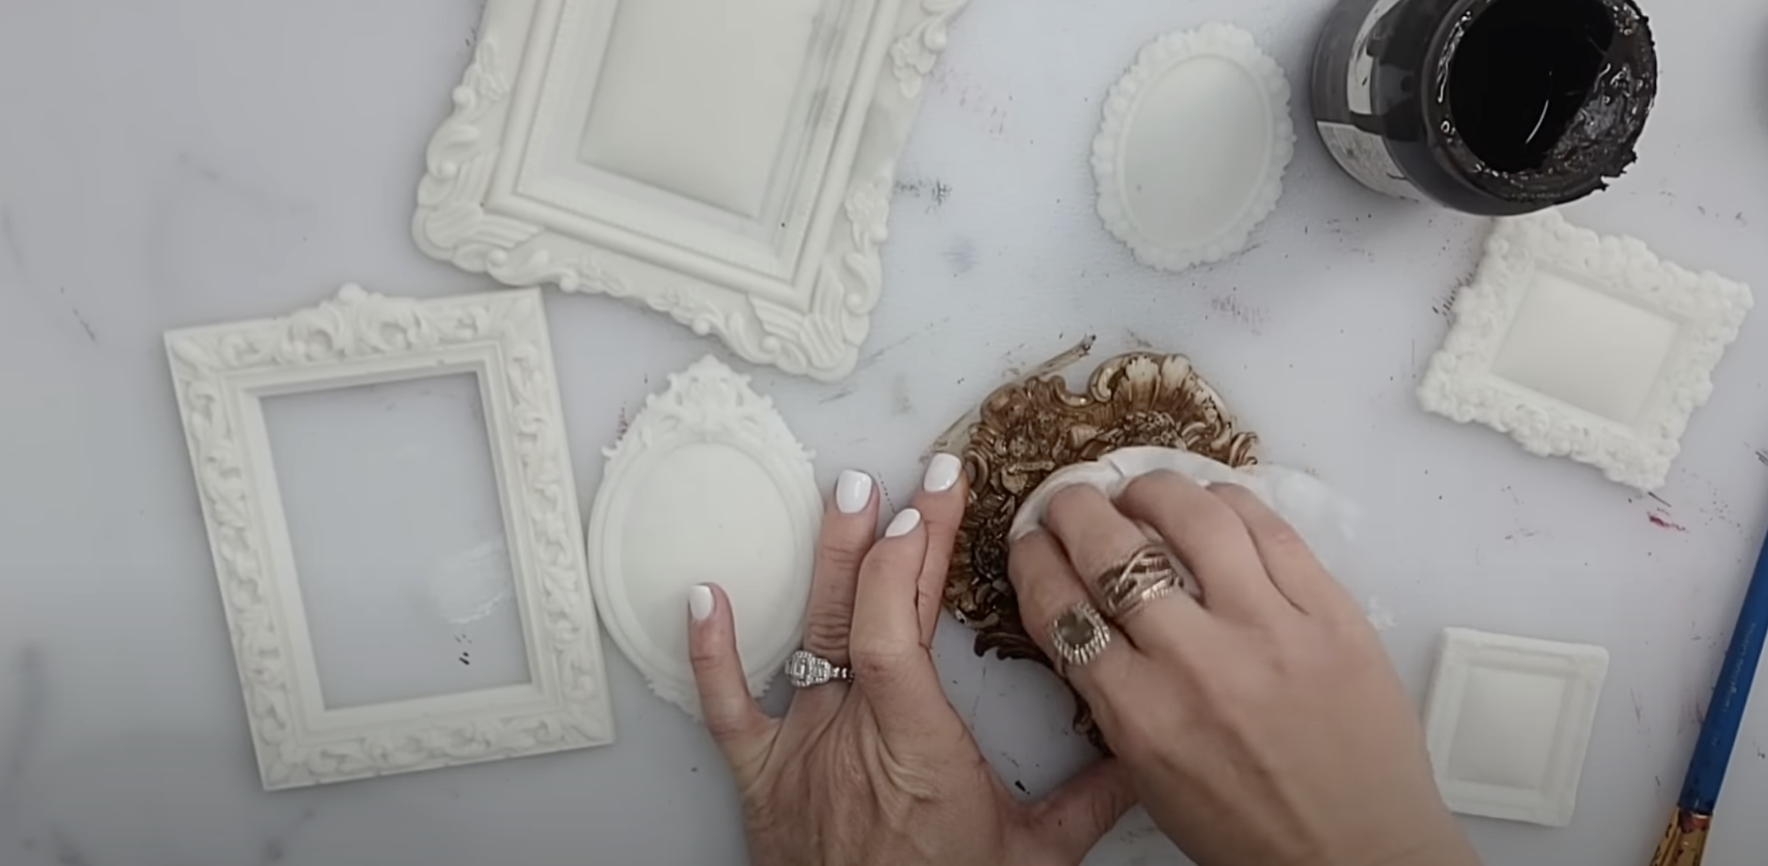
How cool are these antique picture frames? The antiquing glaze perfectly highlights all of the detailing in the frames.

Next, I pulled out my Fusion Decoupage Transfer Gel so that I could add the JRV decoupage paper.

I used a STAALMEESTER Pointed Sash brush to apply the decoupage transfer gel onto the picture part of my frame.


Next, I firmly pressed one of my JRV decoupage pieces into the frame right on top of the transfer gel.
No need to trim the paper to size just yet. Just make sure that it covers the entire area of your frame. I prefer to use my nail to mark the frame's edges; this will simplify the cutting process in a later step.

Then, I used an exacto knife to cut the decoupage paper down to size.


If your frame doesn’t have a back, you can use a piece of cardstock to create your frame image.
Follow these steps:
Apply fusion decoupage gel to cardstock
Press decoupage paper on top of cardstock facing up
Apply fusion decoupage gel to the top of the decoupage paper
Use a hot glue gun to glue the cardstock to the backside of the frame


Look at how beautiful these look!

Lastly, let’s apply a red ribbon hanger so that we can hang these on our tree as vintage ornaments!

With your hot glue gun, apply two lines of glue on the upper backside of your frame so that you can make a ‘U’ shaped hanger.
After you've applied the hot glue to the backside of the frame, press the red ribbon into the hot glue.
Then, let the ribbon and glue dry before hanging up!


That's all there is to it! One aspect I truly appreciate about this project is its simplicity and ease. I could sit down and create without needing any saws or heavy-duty tools. There's something wonderful about just relaxing and crafting at your desk.

All that is left is styling these vintage Christmas ornament frames amongst your holiday decor or simply hang on your Christmas tree!


This blog is all about How To DIY Picture Frames into Vintage Christmas Ornament Picture Frames!
Click Image To Shop


What Is The Colors Of The Month Club?
Don’t forget to join the Colors of the Month Club to receive (4) sample Fusion Paint colors I picked that are perfect for the current season! → Click here to learn more
Like what you see? Be sure to join our mailing list for weekly DIY Ideas, thrift flips, new product alerts, video announcements, live events & more!
DISCLAIMER: This blog post may contain affiliate links. If you purchase a product or service with the links provided I may receive a small commission. There is no additional cost to you. Thank you for supporting my blog so I can continue to provide you with free content each week!


DIY GUIDE: How to personalize your throw pillows with IOD stamps