
How To DIY White & Gold Christmas Trees For Your Holiday Decorations
**This post contains affiliate links for your convenience. I may earn a small commission if you make a purchase from these links.**
As winter arrives, my home becomes a haven of warmth and festive cheer, adorned with a collection of vintage and antique decor pieces! From repurposing old treasures to infusing a touch of nostalgia into every corner, I look forward to the coziness in my home every year!
White and gold Christmas decor is my favorite combo. Join me as I guide you through crafting your own white & gold Christmas tree decorations, turning your space into a sparkling winter wonderland!
In this blog, I will show you How To DIY White & Gold Christmas Tree Decorations!

Below is a list of the items you will need to recreate this project:
Flat Wooden Christmas Tree
Paper Towel
Gold Decorated Tissue Paper
*Product can be purchased directly through my website [www.juliesdesignsandsigns.com]
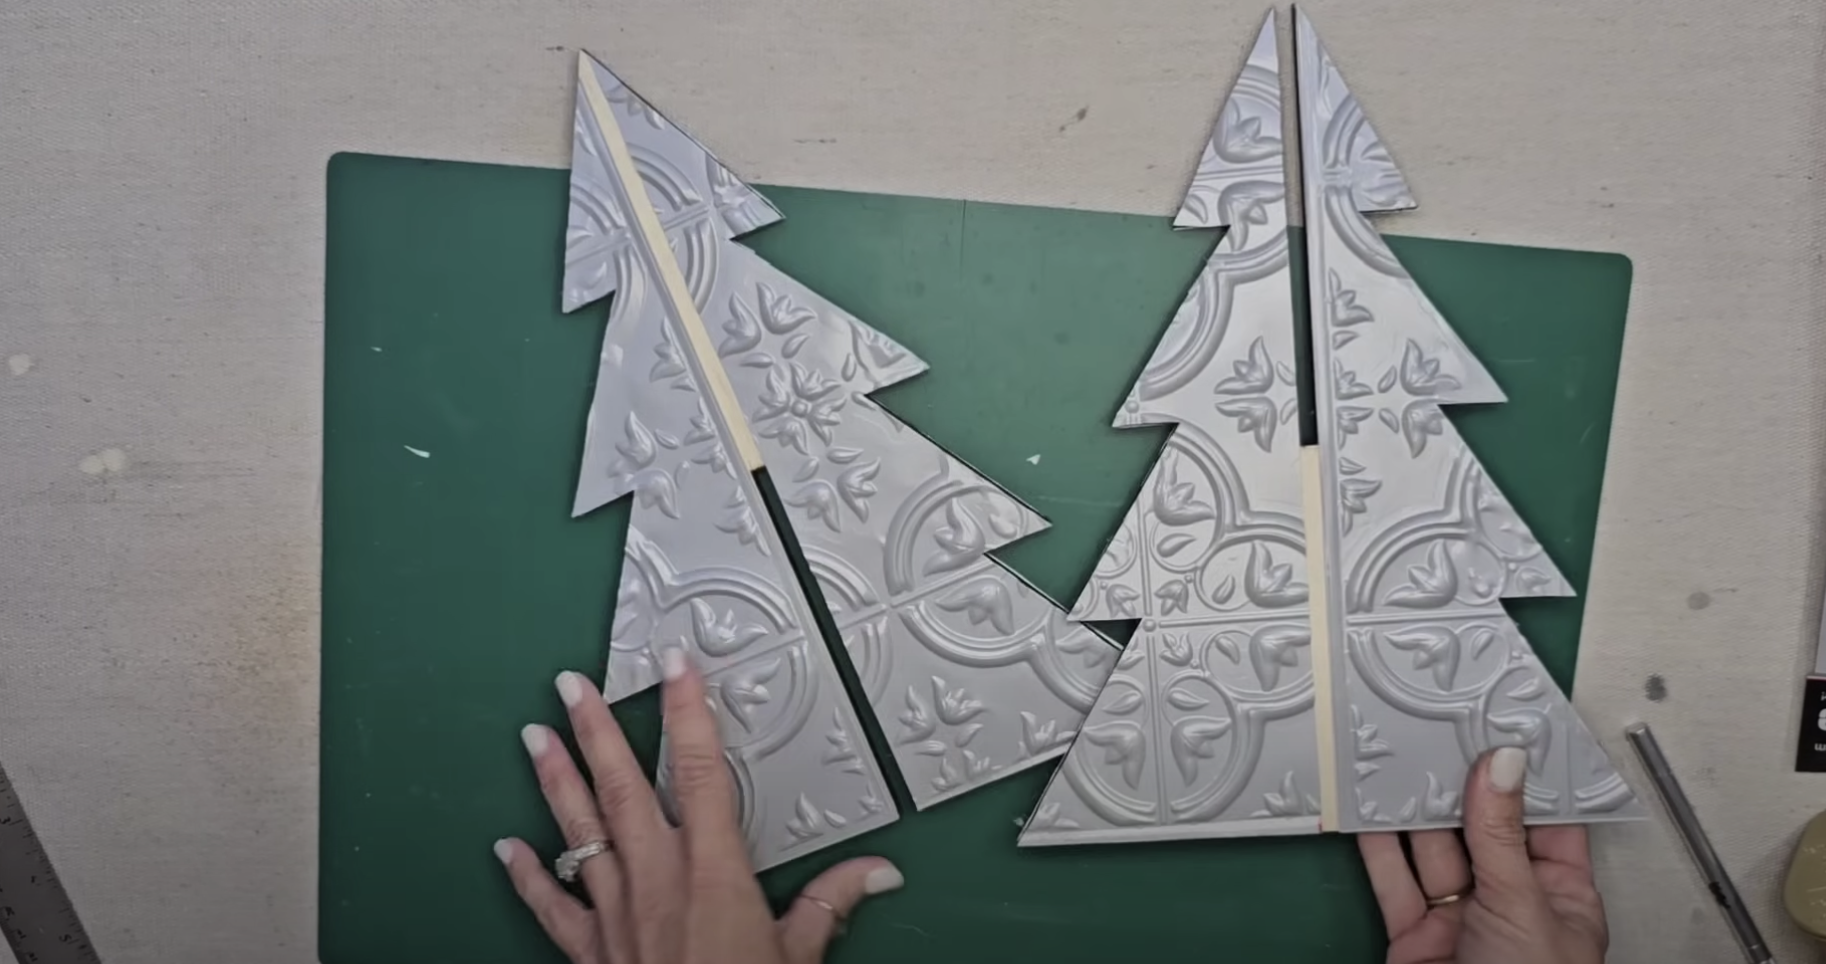
For this project, I started with self adhesive wall tiles from Dollar Tree!

I did not want anything down the center of my tree because I knew I needed to slide the trees into the slots when combing the two pieces.
I applied adhesive to half of the tree and then used another piece to apply adhesive to the other side.

I utilized scissors to trim down the wall tile material.
Then, I used an exacto knife to perfectly cut the wall tile to match the shape of the trees.


Following that, I grabbed my hot glue and glued down all of the edges so that the wall tile material was permanently attached to the wood.

At this point, the below image is how your Christmas trees should look. Once we paint the trees, the wood slit down the center will blend in perfectly.
I used Rust-Oleum Metallic Gold spray paint to coat the entire trees.

If you love the bright gold look, you can leave your trees as is!

If you appreciate a richer, more antique look like I do, grab your Fusion Antiquing Glaze and apply a coat over the top using a STAALMEESTER Pointed Sash Brush.


After applying a coat of antiquing glaze on top, I used a dry paper towel to lightly wipe away the excess glaze. You will notice that the glaze highlights all the intricate details.


What do you think? The Fusion Antiquing Glaze adds the perfect amount of aged richness to these trees!

Once I finished with those, I moved on to my next design using the same style of slotted wooden craft Christmas trees.
For this next tree, I decided to decoupage gold and white tissue paper onto the wooden surface!

As you can see below, the tissue paper is see-through.
When you use this decoupage technique — you can see the background of the product. Applying a quick coat of paint will make the overall product look much better!


After that paint dried, I applied a full coat of Fusion Decoupage & Transfer Gel to the wooden tree.

Next, I laid the gold tissue paper on top and grabbed my IOD brayer so that I could smooth out the tissue paper.
You may not achieve a completely smooth surface, and that's perfectly fine. However, the brayer should assist in making it as smooth as possible!

DIY Hack: Instead of cutting the edges of your decoupage tissue paper, rub sandpaper along the edge and it will tear off a nice clean edge!


How pretty does that look? I love it!

Once I removed the edges, I applied one more coat of decoupage & transfer gel to seal the trees.

I decided that I wanted the unfinished edges to match the gold style a little bit more.
Using a STAALMEESTER Artist Round Brush and Dixie Belle Gold Gilding Wax — I applied gilding gold wax to the raw edges of the tree.


And there you have it!
Would you believe they started as basic wood slotted trees? They exude a delightful festive charm with a touch of vintage!

This blog is all about How To DIY White & Gold Christmas Tree Decorations!
Click Image To Shop


What Is The Colors Of The Month Club?
Don’t forget to join the Colors of the Month Club to receive (4) sample Fusion Paint colors I picked that are perfect for the current season! → Click here to learn more
Like what you see? Be sure to join our mailing list for weekly DIY Ideas, thrift flips, new product alerts, video announcements, live events & more!
DISCLAIMER: This blog post may contain affiliate links. If you purchase a product or service with the links provided I may receive a small commission. There is no additional cost to you. Thank you for supporting my blog so I can continue to provide you with free content each week!


DIY GUIDE: How to personalize your throw pillows with IOD stamps