
How To DIY With Dixie Belle Patina Paints
**This post contains affiliate links for your convenience. I may earn a small commission if you make a purchase from these links.**
Have you ever walked through the aisles of a thrift store, feeling the pull of hidden treasures waiting to be discovered? Well, that's exactly what happened when I was thrift shopping the other day.
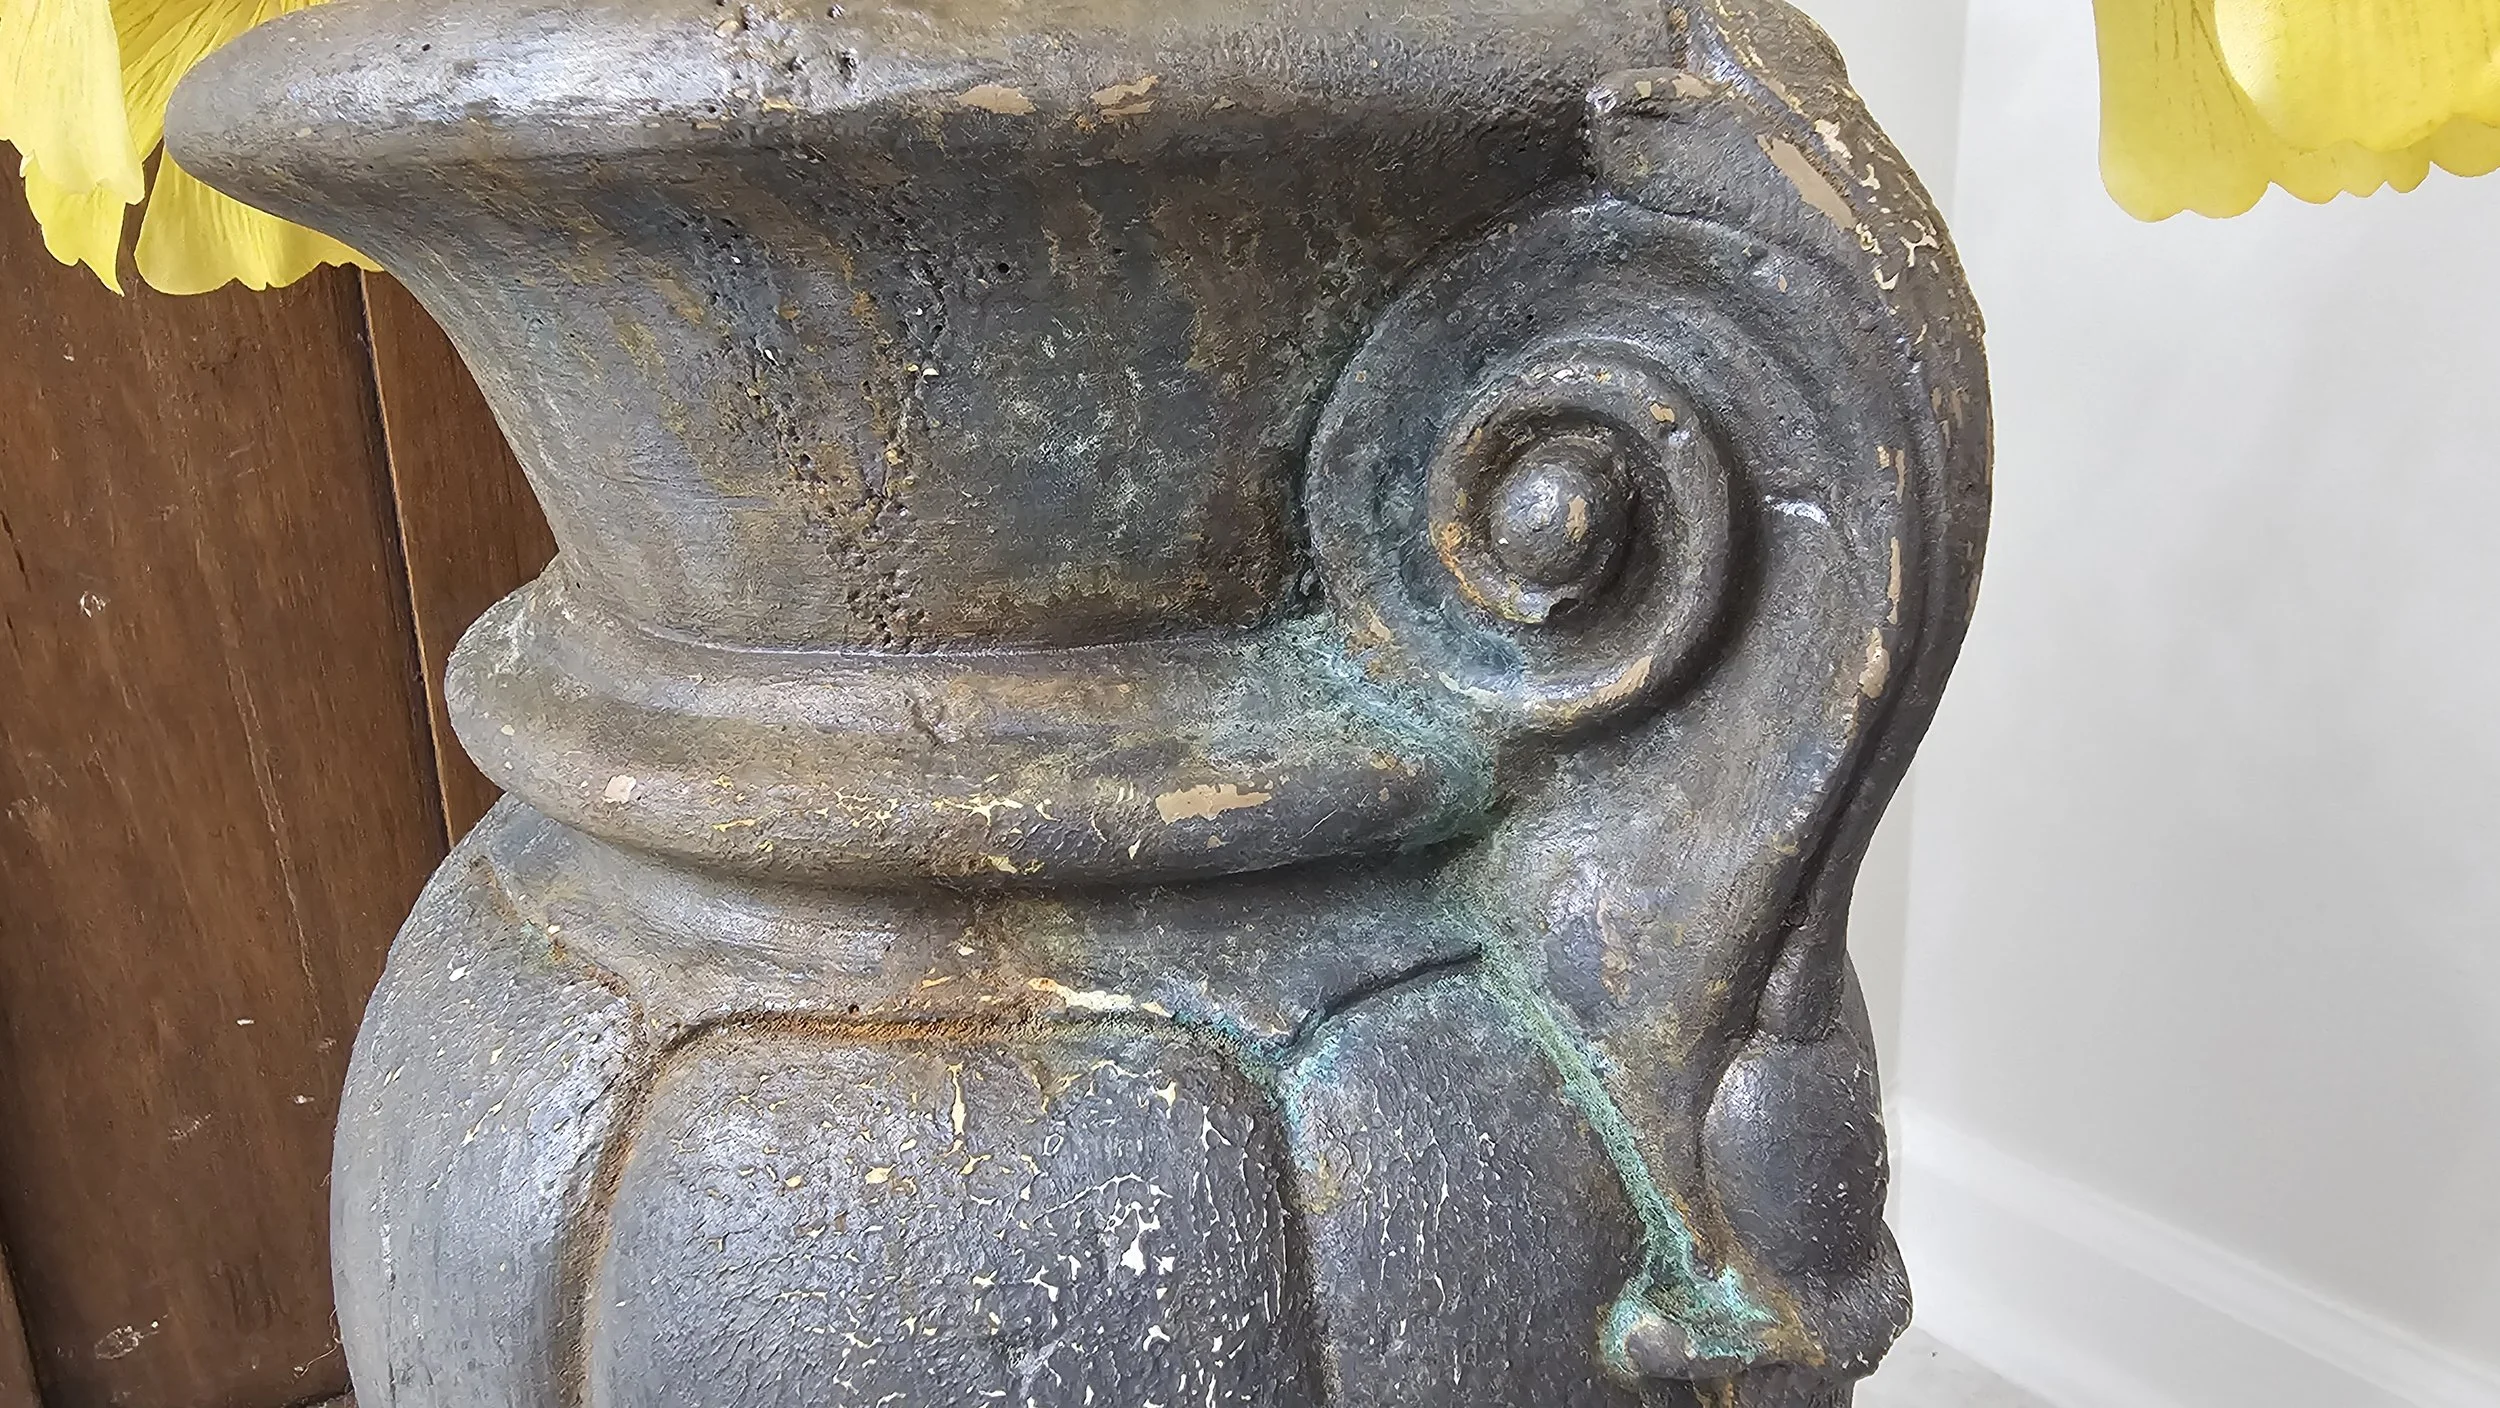
An old vase, was nestled among forgotten items at my local Goodwill. The cracks on the side showed me that this vase had quite a history and it’s tired appearance begged for a revival.
I knew right away what this vase needed: Patina Paints! With their transformative powers, I was able to breathe new life into this thrifted vessel, bringing out its hidden beauty and transforming it with character that will transcend time.
In this blog, I will show you How To DIY With Dixie Belle Patina Paints to transform a vase from dull and damaged into a mesmerizing masterpiece!


Below is a list of the items you will need to recreate this project:
Thrifted Large Vase
Sand Paper
Paper Towel
*Product can be purchased directly through my website [www.juliesdesignsandsigns.com]
So, picture this: I stumbled upon this beat-up foot-and-a-half-tall vase at Goodwill the other day. And you know me, always got my DIY goggles on! Instantly, my brain starts coming up with ideas and I just knew I could turn this dinged-up find into something seriously cool.

The first thing that I did was sand the spots that have chips so that those areas are nice and smooth.

Moving on to the next step: introducing texture to our piece.
For this, I mixed Fusion Paint in the color Cathedral Taupe with Dixie Belle Sea Spray.

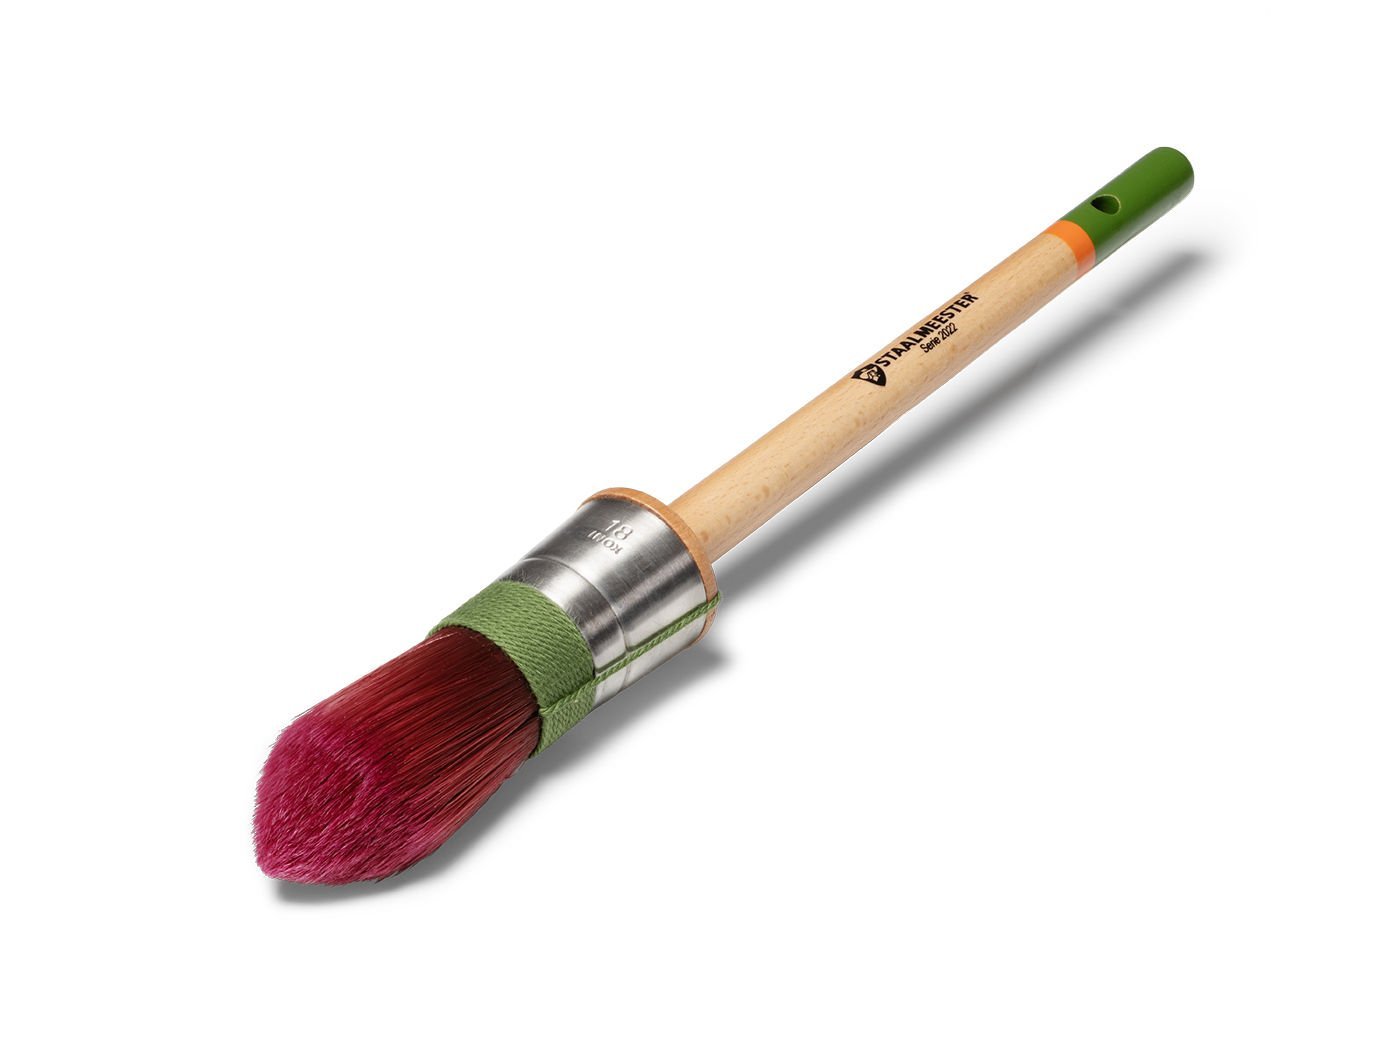
I applied the textured mixture to random spots on the surface with a STAALMEESTER Pointed Sash Brush.


I made sure to apply a generous thick amount creating pronounced peaks and textures in random areas.

Then, I applied two coats of Dixie Belle Patina Paint in the color Iron to the entire piece.


I was not worried about full coverage because the next step was to sand the entire project.
I focused on those strategic spots where I'd applied the Cathedral Taupe textured paint earlier.

I sanded down those textured peaks, unveiling glimpses of the taupe paint color beneath.

The transformation that this piece takes from start to finish is truly incredible. It’s as if it's been transported back in time!

And now, brace yourselves for the magic!
When it comes to Patina Paint, I like to mix both the Green and the Blue bottle for an enchanting rustic effect.

First, I sprayed the Green Patina Spray onto the piece.
Pro tip: Don't hold back, especially on the top and bottom areas—go for a generous coating.
Next up, I used a paper towel to dab away the excess spray. This not only blends the colors a bit but also helps to smooth out any visible spray marks.
It’s okay if it drips down a little bit because that will create a really cool effect at the end.


Just like with the Green, repeat those steps: spray, dab, and repeat.
Keep at it until you've covered the vase to your heart's content.
Remember, there's no rush here—take your time to ensure every inch is just right.


After all that spraying and dabbing, I gave the Patina Paints and Patina Sprays some space to work their magic. I stepped back for about an hour, letting them undergo a chemical reaction that totally transformed the look of the vase.
You might notice that the Cathedral Taupe paint, peeking through after sanding, doesn't react with the sprays. This adds to the unique charm!
When you come back, you'll find the most beautiful colors & rustic effect on your vase.


The final product turned out exactly how I imagined and looks stunning in my living room. I am already dreaming up recreating this DIY project with a bigger piece!

Are you ready to create your own? Be sure to share a photo and tag me on social media [@juliesdesignsandsigns] so I can see what you create.
This blog is all about How To DIY With Dixie Belle Patina Paints!
Click Image To Shop


What Is The Colors Of The Month Club?
Don’t forget to join the Colors of the Month Club to receive (4) sample Fusion Paint colors I picked that are perfect for the current season! → Click here to learn more
Like what you see? Be sure to join our mailing list for weekly DIY Ideas, thrift flips, new product alerts, video announcements, live events & more!
DISCLAIMER: This blog post may contain affiliate links. If you purchase a product or service with the links provided I may receive a small commission. There is no additional cost to you. Thank you for supporting my blog so I can continue to provide you with free content each week!


Transforming Your Thrift Store Finds Into High End Decor With The New Spring IOD Stamps and Moulds